A few days ago, I was reading a post on Facebook by someone asking if onions can be regrown.
I was surprised that so many people didn’t know this, so I thought it might be useful to write an article about it.
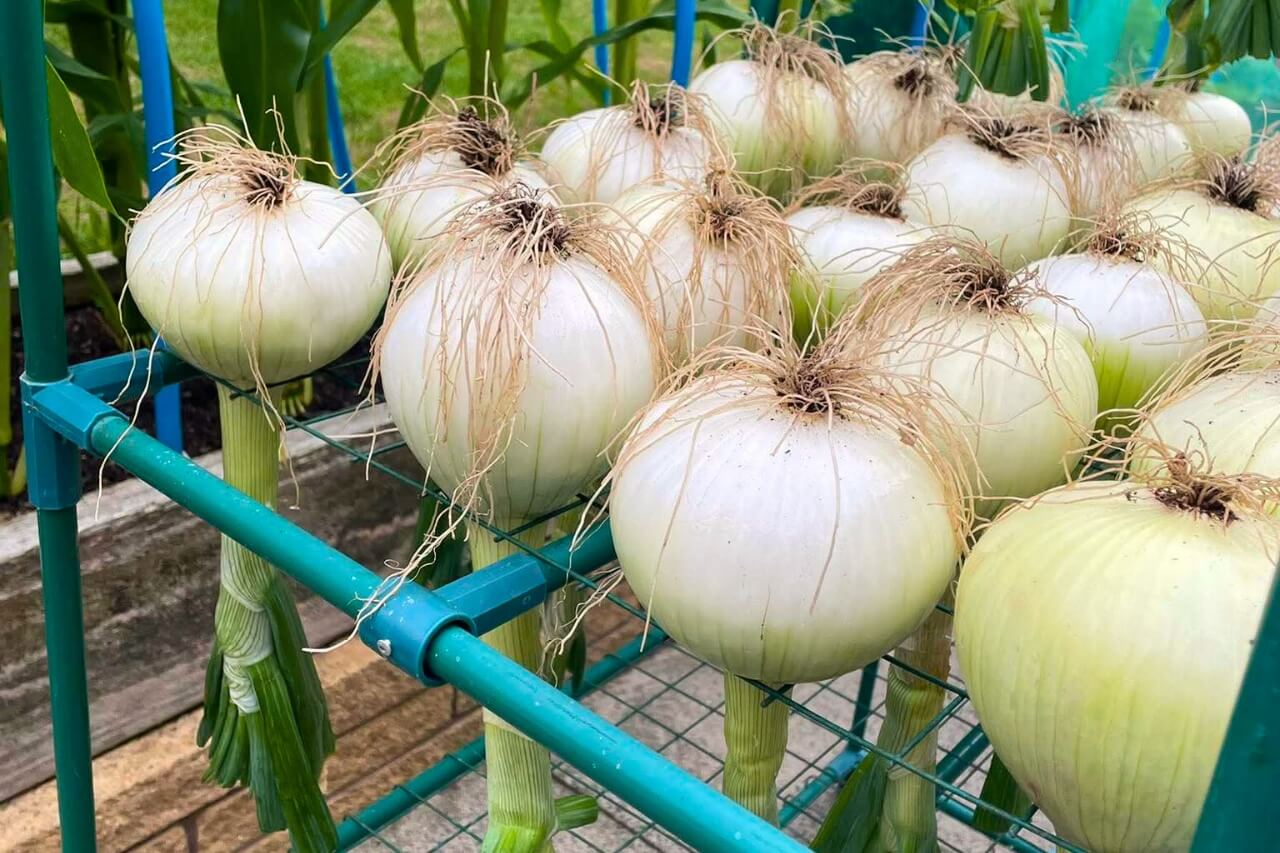
Good news: you can! I’ll tell you more, regrowing bulb onions (like yellow, red, or white onions) from kitchen scraps is actually fun and easy, even if you’re a beginner gardener.
All you need is the bottom part of an onion, the part with the roots, and a little patience.
In this guide, I’ll walk you through the simple steps you need to follow for two different versions: indoors on a windowsill and outdoors in a garden or pot.
Prepare the Materials
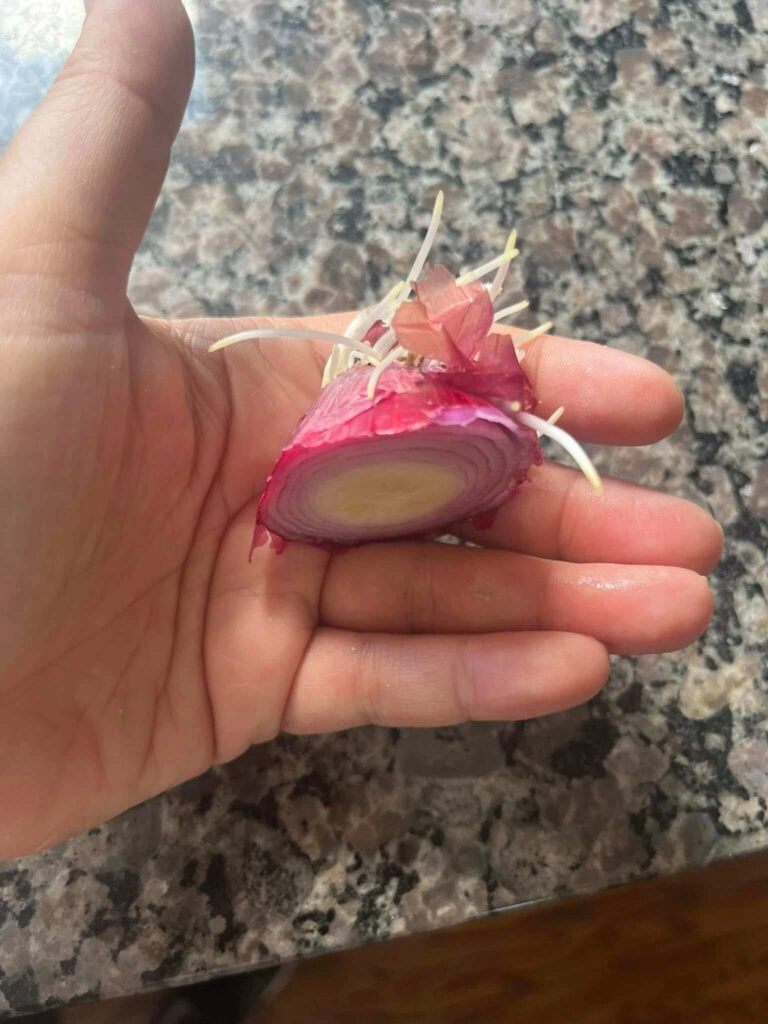
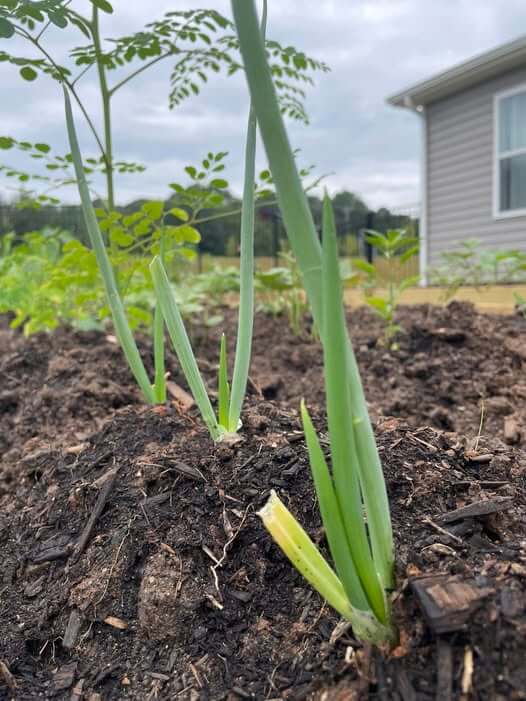
- Onion Scraps: The root end of a bulb onion; it doesn’t matter if yellow, red, or white, they all work. Aim to cut about 1–2 inches from the bottom, and don’t worry if the dried roots are short or even missing – new roots will grow. Just make sure it’s a firm and healthy onion.
- Container or Pot (for indoors): A small jar (for water method) or a pot with drainage holes (for soil method).
- Water and Soil: Clean water for rooting, and some all-purpose potting soil if planting in a pot.
- Toothpicks (optional): Useful if you suspend the onion scrap in water.
- Garden Space or Large Pot (for outdoors): If you plan to transplant outside or grow directly outdoors.
- Sunny Spot: Onions love light. A sunny windowsill or a garden area with plenty of sunlight is ideal.
Regrowing Onions Indoors (Windowsill Method)
If you don’t have outdoor space or want to start your onion inside, the windowsill method is perfect and quite easy.
Choose and Prepare Your Onion Scrap
Select a scrap from a fresh, disease-free onion.
Cut off about 1 inch of the bottom of the onion, including the root end.
You should have a piece that is flat on one side (the cut side) and has the root bits on the other.
Let this piece dry for a few hours up to a day in a ventilated area – this helps the cut surface callus over (form a protective dry layer) and can prevent rotting.
Start the Rooting Process
You can begin rooting your onion scrap in water or soil.
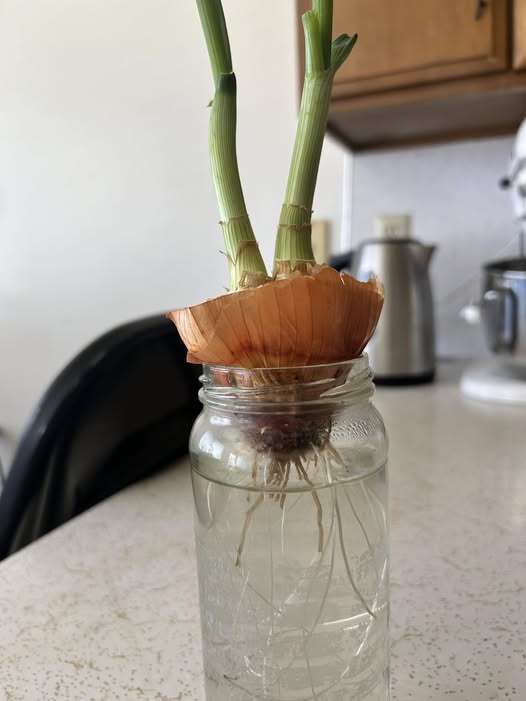
For the water method, place the onion bottom in a shallow dish or jar of water.
Only the very bottom (where the roots are) should touch the water – do not submerge the whole piece.
An easy trick is to use toothpicks: stick 3–4 toothpicks around the sides of the onion bottom and balance it on the rim of a jar so just the roots dip into the water.
Set it on a windowsill with good light and change the water every few days to prevent mold.
In about a week or less, you should notice white roots growing from the bottom. Once you see roots and a few green shoots poking up, it’s ready for planting.
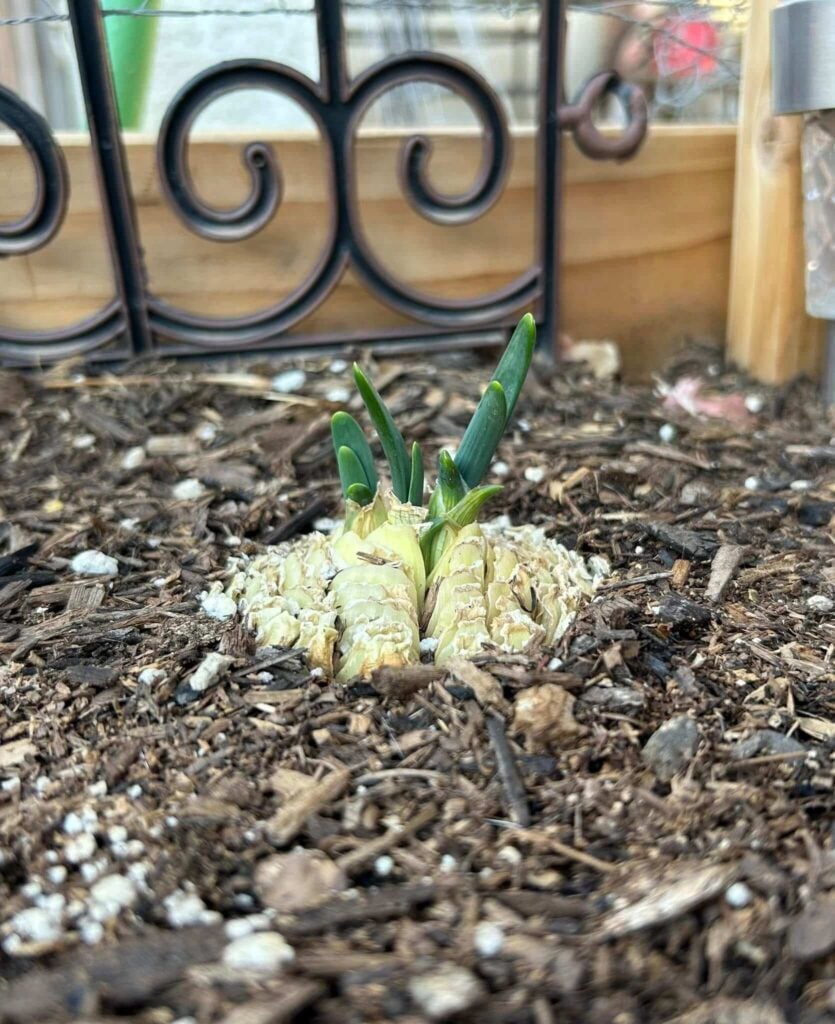
For the soil method, fill a small pot with damp potting soil. Make a little hole and place the onion bottom in the soil, root side down.
Cover it with about 1 inch of soil, or just enough to bury the onion piece entirely (you can let the top of the scrap peek out slightly).
Pat the soil gently and give it a bit of water. Keep the soil moist but not soggy and place the pot on a sunny windowsill. In this method, new roots will start to grow in a few days, and you’ll see green shoots emerging in roughly 2–3 weeks.
Provide Light and Water
Once again, onions grow best with plenty of light, so a sunniest windowsill of a south-facing window is ideal.
Water as needed to keep the soil slightly moist (or to keep the roots in water covered).
For soil-grown scraps, touch the top of the soil – if it’s dry about an inch down, it’s time to water.
For water-grown scraps, remember to refresh the water every few days.
The Green Growth
After a week or two, you should notice new white roots through the jar or at the drainage holes of your pot.
Soon after, green shoots will start poking out of the top of the onion scrap. These are the beginnings of your new onion plant!
If you see strong roots and 2–4 inch green leaves, you are definitely on the right track, and everything has worked out for the best.
If instead the onion piece turns mushy, develops mold, or has a foul odor, that’s a sign it has rotted. Just toss it out and try again with a fresh scrap, making sure to keep conditions a bit less wet next time.
Transplant to a Bigger Pot or Outdoors
Once your onion scrap has established roots and has a few inches of green growth, it will outgrow that small jar or starter pot.
Gently remove the onion from the water or small pot. If there are any slimy old onion pieces (old scales) attached, you can peel those off and discard them.
Then plant it in a larger pot with fresh potting soil, or move it to your outdoor garden (if the season and weather permit).
If the scrap produced multiple green shoots, you can even split them: use a clean knife to cut the onion base into sections, so that each new shoot has some roots attached.
This way, each shoot can grow into a separate onion plant.
After transplanting, water the soil and consider trimming the green leaves by about half to reduce stress on the plant and help it focus on rooting and bulb forming.
If you continue growing the onion indoors (in a pot), make sure it gets as much sunlight as possible. Rotate the pot if the plant leans towards the light. Keep the soil moist, and if the pot is small, you might need to repot to an even larger container as the onion grows (onions form bulbs near the soil surface, so they need some space).
As I was saying at the beginning of the article, if you have a garden, you can also regrow onion scraps directly outdoors.
Just remember that onions prefer cool to mild weather to start growing, so early spring is perfect, once the danger of hard frost has passed.
Outdoors, you might see growth in a couple of weeks, depending on the temperature. Just be patient and keep the area weed-free. Have a look at the article on perennial flowers that naturally crowd out weeds.
You do not need to trim the leaves outdoors because, in this case, they feed the growing bulb (they’re like solar panels capturing sunlight).
You can also sprinkle a general vegetable fertilizer or compost around the base if you want to give them a boost. I recommend one of my favorite ways to compost.
The final thing that I wanna say is that regrowing an onion into a full bulb is not an overnight task, but your patience will pay off.
Typically, it can take around 90 to 120 days from the time you plant the scrap to get a new mature onion bulb.
If you want something faster, have a look at fast-growing veggies you can harvest in about 1 month.