
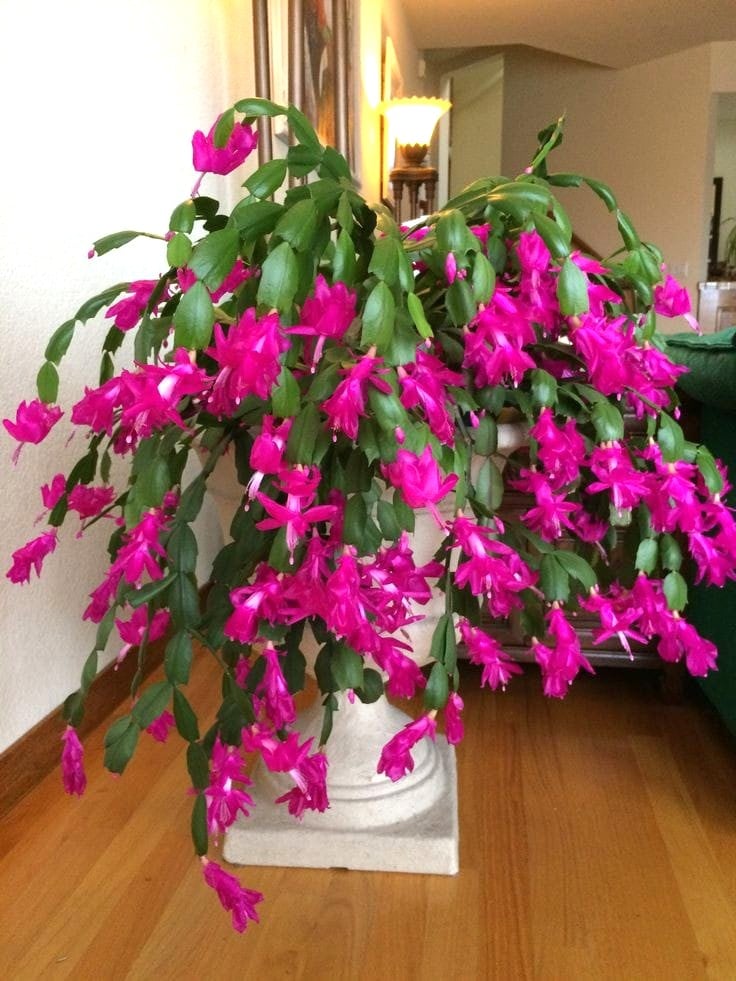
Hey there, plant friend! Today, we will talk about one of my favorite houseplants: the Christmas cactus.
There’s something utterly satisfying about coaxing a new plant out of an old one, isn’t there? I remember staring at my Christmas cactus last year, thinking, “Imagine multiplying you for everyone I know!”
Turns out, it’s not magic, just a little propagation, and trust me, I’m no gardening guru, years ago I could barely keep a peace lily alive, but Christmas cacti? Those babies are practically begging to be multiplied.
They’re super forgiving and really want to live, which is great news when you’re as clumsy as I am.
Let’s break it down. Here’s what you’ll need
A healthy Christmas cactus plant: pick one that looks happy and well-watered. Avoid using a sickly or wilted section; we want strong genes for your new plant babies.
Pruners or sharp scissors: my kitchen scissors do just fine, just make sure they’re clean.
PRO TIP: Give them a quick wipe with rubbing alcohol if you remember, but if you forget, it’s usually okay.
Pots with drainage holes: You don’t need anything fancy. A 3–4 inch pot is perfect for a cutting (these cacti have tiny roots at first anyway).
Well-draining potting mix: I like a cactus or succulent mix from the store. If you have regular potting soil, just mix in some perlite or coarse sand so it drains well.
Optional rooting hormone: Totally optional. I’ve never bothered with it, and my cuttings still root. It can speed things up slightly, but the cactus will take care of itself.
A little patience: This might be the hardest part 😉
Steps to Propagate Your Christmas Cactus
1. Choose and snip your cutting
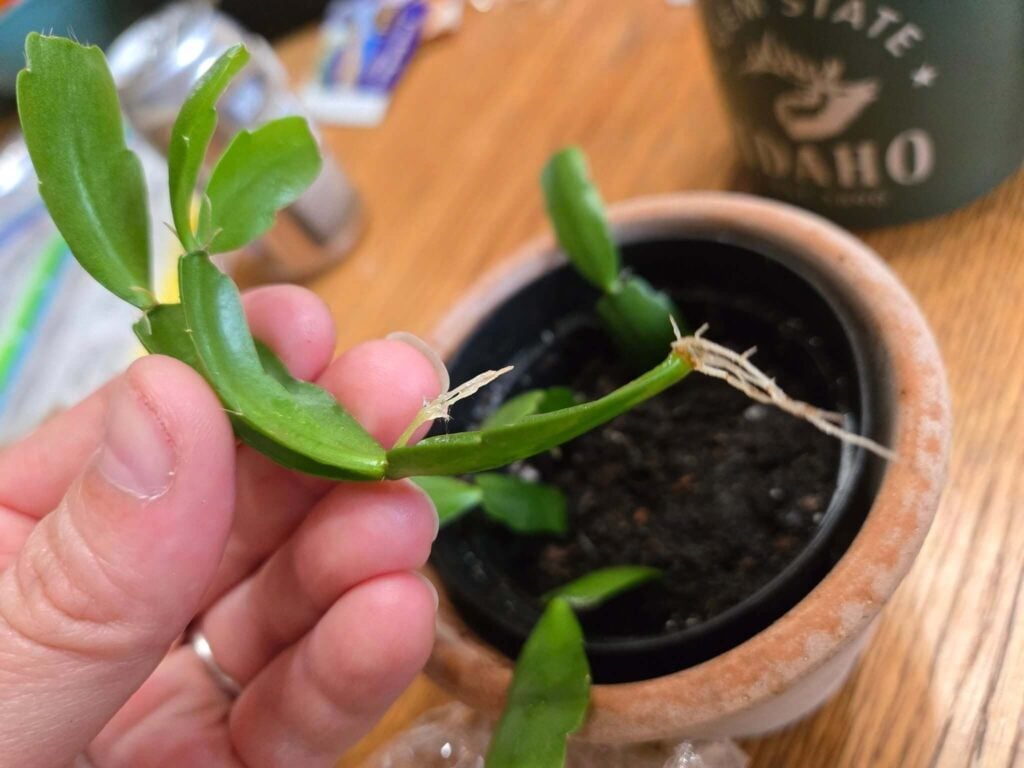
Look for a healthy stem segment of 2–3 “leaves” (the flat, leaf-like segments).
I often break these off by gently wiggling them; they usually snap right where they join.
Just be sure to take a whole segment (not a broken half); it helps with rooting. If twisting feels weird, use your scissors to cut at the joint instead.
2. Let the cutting callus (dry out)
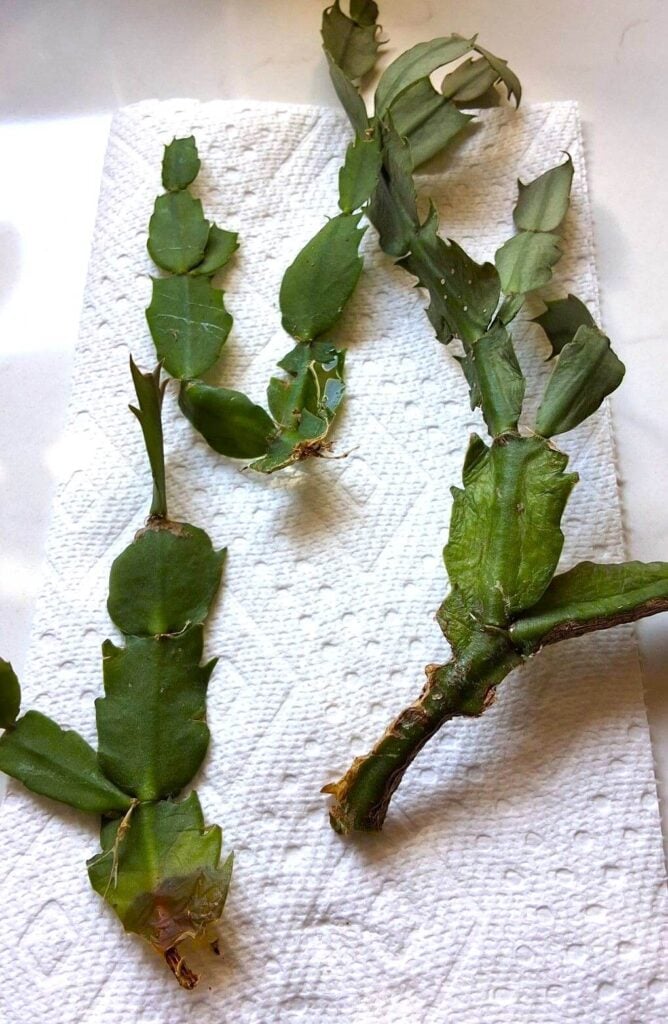
This is an important step: lay your cuttings on a paper towel or dish and let the cut ends dry for a day or two.
It sounds weird, but it’s like letting the wound heal so it won’t rot.
I admit, I sometimes only wait a few hours if I’m impatient, but the longer you let it dry, the safer. When that end forms a tiny hard scab, it’s ready for soil.
3. Fill a pot with soil
Put your potting mix into the small pot.
Tamp it down gently so it’s not rock hard. I always say that it has to feel like a firm marshmallow.
Make a hole about half an inch to an inch deep with your finger or a pencil eraser. This is where your cutting will go in.
4. Plant the cutting
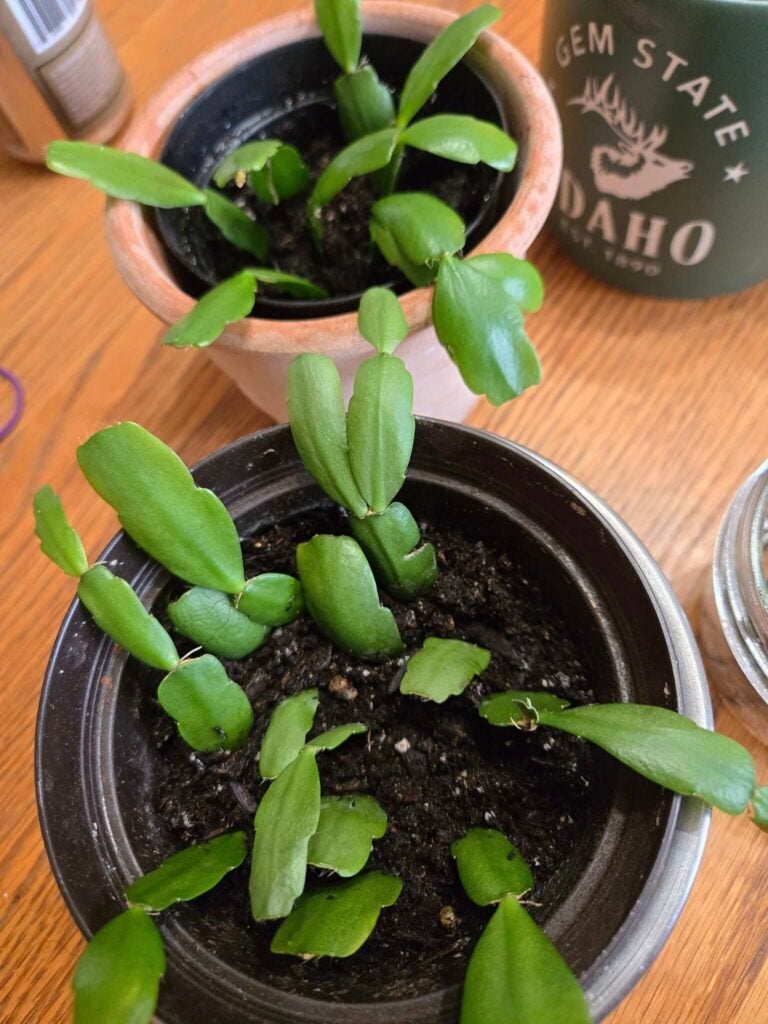
Take your dried-out cutting and stick the bottom end (the end that was attached to the mother plant) into that hole.
You only need to bury it a little, about half an inch. Once it’s in, press the soil around it to help it stand up.
If you’re feeling adventurous, you can put a couple of cuttings in the same pot. They grow slowly, so they won’t fight for space at first. Just tuck them side by side and give them a gentle squeeze of support in the soil.
5. Give it a drink (carefully)
Right after planting, water the soil lightly.
I usually pour just enough to moisten it without flooding. A spray bottle is a handy way to do this gently.
Just make sure the soil is only slightly damp, not waterlogged. As you probably already know, Christmas cactus cuttings don’t like their feet too wet.
6. Find a cozy spot
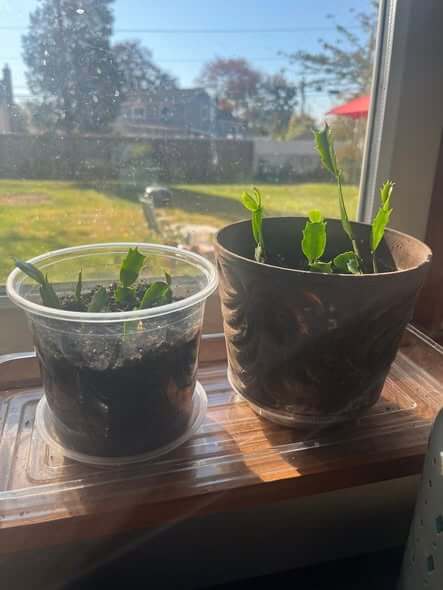
Place the pot in a warm spot with bright, indirect light.
My cactus lives on a kitchen counter near a window that gets nice morning sun. If you have a super hot afternoon sun, maybe shield it a bit since too much direct heat might stress the new cutting.
Room temperature (around 65–75°F) is just right. And please remember to keep it away from freezing drafts and hot radiators.
7. Wait and watch
Now comes the hard part: waiting!
Over the next few weeks, keep an eye on your soil. When the top half-inch of soil dries out, give it a little water again.
In a month or so, you should start to see tiny roots anchoring in the soil and even a little green bump, which is a new segment!
It’ll be pretty exciting to see those tiny new bumps; it means your cactus is rooting nicely. Just try not to disturb them and let nature do its thing.
Caring for Your New Christmas Cactus
Once your cutting has rooted and starts growing, be careful how you treat it, especially when it is still small.
Let the top inch of soil dry out before watering again. I usually stick my finger in the pot to check.
Overwatering can make the segments turn reddish or shrivel, and nobody wants a sad cactus.
Unfortunately, this is one of the most common mistakes. To avoid them, I recommend checking out the specific article listing the mistakes to avoid with Christmas cacti.
In addition, as I mentioned earlier, bright, indirect light is best. A spot near an east or north-facing window often works nicely.
Another thing to consider is that they love warmth (around 65–75°F) and a tad of humidity. I often mist mine every now and then or set the pot on a tray of damp pebbles.
Just don’t let it sit in a puddle and protect it from cold drafts. These guys are tropical, not desert cacti, so they do appreciate a little cozier environment.
Lastly, have a look at the 10 tips to always keep your indoor plants healthy.