How to Prune Queen of the Night Plant : Like a Pro
Gardening enthusiasts know pruning is necessary for maintaining plants’ growth and appearance. It impacts the health and look of your plants. If you own the Queen of the Night Plant, you understand the significance of keeping it healthy and well-maintained. Including pruning in your care routine is important. It stimulates healthy growth and produces eye-catching blooms.
We will provide step-by-step instructions on How to Prune Queen Of the Night Plant. We will cover everything from when to prune to the tools you need and the process.
How to Prune Queen of the Night Plant
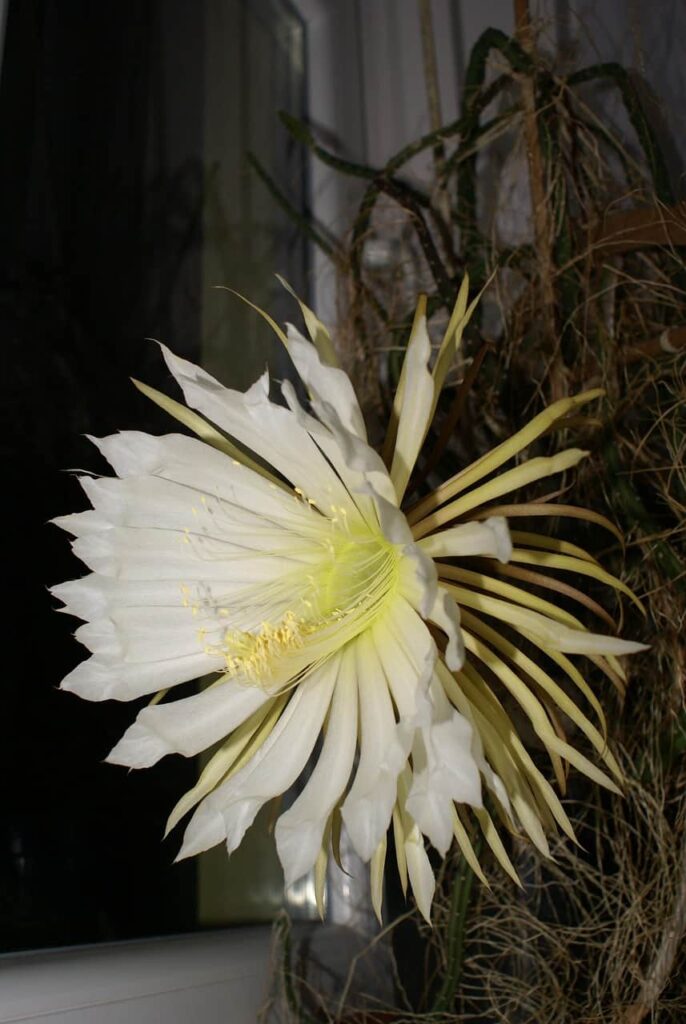
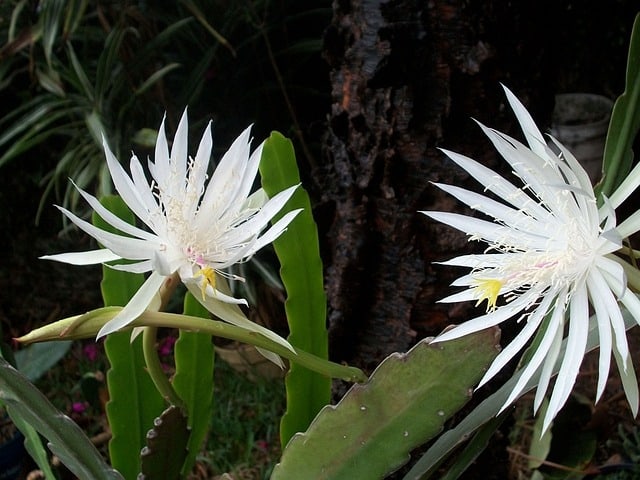
The Queen of the Night plant does not need extensive pruning. The primary pruning rule for this plant is to remove withered flowers and any dead or damaged branches. By doing so, the plant can redirect its resources and nutrients toward healthy growth and development.
Removing spent flowers also helps promote the aesthetic appeal of the plant. But it’s important to avoid excessive pruning. That could impact the plant’s ability to produce flowers.
Monitoring and maintaining the Queen of the Night plant will ensure optimal health and vitality. You must understand its growth pattern to prune your queen of the night cacti.
Read More :- How To Prune A Snake Plant – The Quick & Easy Way
Step-by-Step Pruning Process:
Assessing the Plant:
Before pruning your Queen of the Night plant, assess its health for signs of pests and disease. Identify any dead or damaged branches.
Inspect each branch before cutting with clean and sharp pruning shears. Don’t to over-prune, weakening the plant’s structure and reducing flower production.
Inspect its shape and size to determine which branches need pruning. Sterilize your sharp pruning tools and wear gloves to avoid injury. Before starting the process in late winter or early spring for best results.
Prepare your tools
To prevent the transmission of diseases to healthy branches. Use a pair of sharp pruning shears and sterilize them with rubbing alcohol or disinfectant spray. This will help maintain the health of your plants and protect them from infections that can spread.
Also, using dull pruning tools can cause damage to the plant’s tissues. It leads to slow healing and increased susceptibility to further damage. So, keeping your pruning tools sharp and clean is crucial for maintaining healthy plants.
Removing Dead or Damaged Branches:
The first stage in the pruning process for your Queen of the Night plant is to remove branches that are either dead or damaged. Next, check for spent flowers and trim them. Cut below the withered flower head, not cutting any healthy tissue. This will promote new buds to form and stimulate flowering in the future.
To prune branches, identify which ones need to be removed. Cut the branch stem about an inch from the ground and as close to the main stem as possible. It prevents stubble and allows for better drainage and air circulation throughout your plant.
Clean up the debris:
After pruning your plants, collect all the pruned parts and dispose of them. Avoid composting or leaving them on the soil. They might contain pests or diseases that can harm your plants.
To maintain the health of your garden and prevent the spread of plant diseases, it is crucial to dispose of pruned parts properly. You can dispose of the pruned parts by placing them in a yard waste bin or taking them to a local composting facility.
Read More:- How To Prune Curry Leaf Plant: 5 Easy Steps
Maintenance after Pruning:
After removing dead or damaged parts from the plant. Use Fungicide in the cutting area.
It prevents the development of fungal infections that could harm your Queen of the Night plant. Apply a small amount of fungicide to the cutting area after each cut using a clean cotton swab or brush. This will help promote healing and prevent pests and diseases from infecting your plant through the open wound.
Apply a slow-release fertilizer with potassium and nitrogen to promote healthy growth. Check your Queen of the Night for pests like mealy bugs or mites and take steps to eliminate them.
Watering regularly is also important. Queen of the Night plant does like moisture soil. So Before waiting, make sure the soil dries out completely. Also, be careful about over-water, as excess water can lead to root rot. Provide plenty of direct sunlight, which requires bright, indirect light to thrive.
To fertilize the Queen of the Night plant, use a balanced, water-soluble fertilizer for cacti and succulents. Dilute it according to instructions. Apply around the base every 2-4 weeks during the growing season. Avoid overfertilizing and check the plant’s response for optimal growth.
Repot your plant if needed.
When your night-blooming cereus outgrows its current container. It is necessary to repot it in another pot with drainage holes. Select a container that is bigger than the previous one. Repotting an orchid cactus is best done during the growing season, which falls between September and January. When choosing a potting soil mix for your orchid cactus. Use soil mix that is made for cacti. Selecting one that is well-draining and rich in nutrients is important. Add rough sand, perlite, peat moss, coconut coir, and pine bark for a high-quality soil mix.
While transplanting, remove the plant from its previous pot and disentangle any twisted roots before planting it into the fresh blend.

FAQs
Why doesn’t my queen of the night ever bloom?
If your Queen of the Night plant has yet to bloom, it’s likely due to insufficient sunlight or improper fertilization. Provide enough light and use a balanced, water-soluble fertilizer for cacti and succulents.
Also, allow the soil to dry completely before watering and avoid over-fertilizing. With proper care, your Queen of the Night should bloom beautifully.
Why does Queen of the Night turn yellow?
There are lots of possibilities. One common cause is overwatering, leading to root rot and yellowing leaves. Another reason could be insufficient sunlight or nutrient deficiency.
Provide adequate sunlight and proper fertilization. If the problem continues, you may want to repot your plant in new soil with good drainage. Also, change the frequency of water.
When is the Best Time to Prune the Night Cactus?
The best time to prune the Night Cactus (Epiphyllum Oxypetalum) is early spring before new growth starts. This timing plant has enough time to recover and regrow without hiccups.
It is important to avoid pruning during the winter or when the plant is flowering. It may disrupt the blooming cycle.
By pruning in the early spring, you can ensure the health and vitality of your Night Cactus while maintaining its beautiful appearance.
Read More:- How To Propagate Willow Trees: Tips For Planting And Growing
Conclusion
To care for and maintain the Queen of the Night plant, it is crucial to prune it regularly. By following the steps outlined above, you can guarantee that your plant will remain in good health and keep its beauty for many years.
Using sharp and clean tools when pruning is important, as excessive pruning can damage the plant. With a small investment of time and energy, your Queen of the Night plant will flourish and amaze with its gorgeous flowers.