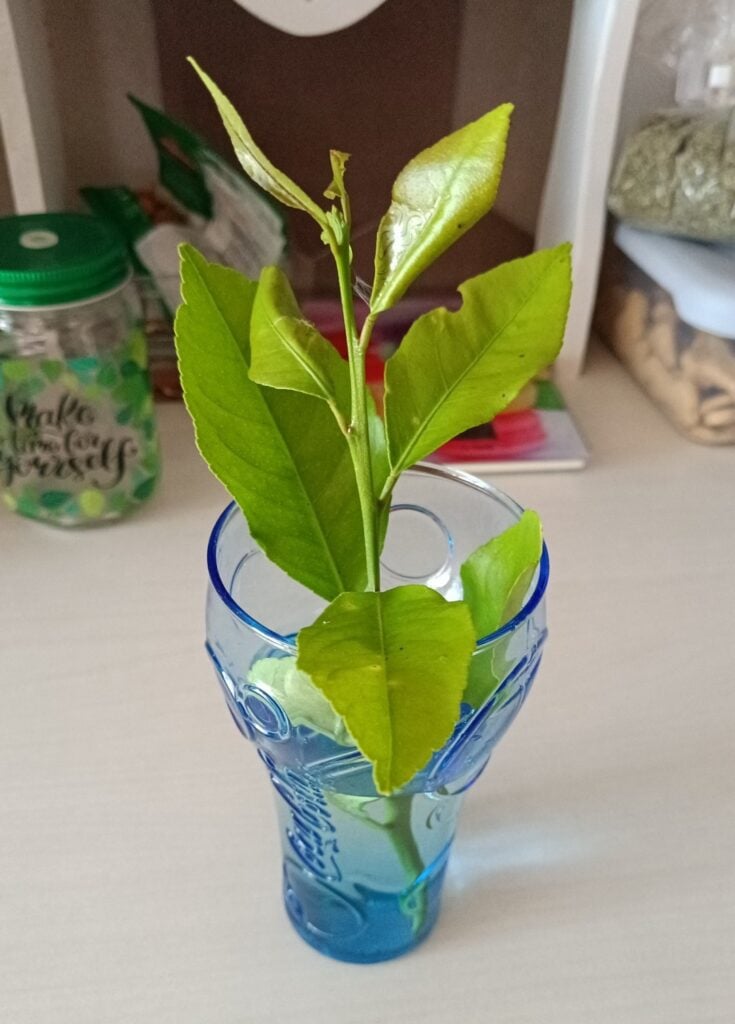
Have you ever walked into a room and been greeted by the refreshing smell of lemon? It’s one of my favorite little pleasures at home.
I’m not talking about a spray or a candle either, I mean the real, living scent from a lemon plant I’ve been growing right in a cup on my windowsill.
As a plant lover (not a pro, just an enthusiast who sometimes forgets to water on time), I promise this is one of the most rewarding and surprisingly easy projects I’ve ever tried.
Why Grow a Lemon Plant in a Cup? (The Awesome Benefits)
Honestly, when I first heard about growing a lemon plant in a cup, I thought, “Can that really do anything?”
Well, I discovered some benefits that made me absolutely fall in love with it.
Natural Air Freshener
First, the lemony fragrance that comes from the leaves is incredible. It’s like nature’s own air purifier with no chemicals, just pure fresh citrus aroma.
PRO GARDENER: Lemon leaves actually release subtle oils that can even help clean the air and fend off some insects.
Instant Mood Booster
Like many of you, I love keeping plants at home; they’re like an antidepressant for me, and this small plant certainly contributes to it.
In addition, if I’m having a blah day, I’ll gently rub a leaf between my fingers and breathe in deeply. That zesty scent instantly makes you feel a bit more awake and upbeat.
I swear, I’m not just imagining it. Even researchers say the scent of lemon can lift your mood and reduce stress. In a specific study, students in lemon-scented rooms felt more relaxed and focused than those without it.
A Little Green Décor
Aside from the scent, have you seen how cute a lemon seedling is? Mine has these glossy little green leaves that catch the sunlight by the window.
It’s like a tiny piece of living décor that makes your home feel more alive and cozy. Way better than another knick-knack collecting dust, if you ask me.
Plus, caring for this plant has become a beloved ritual. Every morning I check on it, give it a little water or just say hi (yes, I talk to my plants… no judgment!).
There’s something so calming and satisfying about nurturing a plant from seed and watching it grow. I always say that gardening, even on a tiny scale, can be surprisingly therapeutic.
How to Grow Your Own Lemon Plant in a Cup (Step by Step)
Okay, now let’s get down to business. Once again, growing a lemon plant in a cup is super easy. I’ll say easier than baking a lemon pie (and probably more fun, in my opinion).
I’m going to walk you through exactly what I did, warts and all.
What You’ll Need:
Before we start, gather a few basic supplies. I mostly got these up from my kitchen and junk drawer:
A fresh lemon: You only need one or two seeds, but pick a nice, plump lemon.
PRO TIP: It’s pretty important to pick an organic lemon. Some store-bought ones have seeds that won’t sprout.
A cup or mug: I used an old ceramic coffee mug. Use something about 6–8 inches deep. If it doesn’t have a drainage hole (mine didn’t), no worries. Put a few small pebbles at the bottom for drainage to keep the roots from sitting in water.
Potting soil: Don’t overthink this, any good potting mix will do, but if you have a mix meant for citrus or seedlings, even better.
Water & a spray bottle: For keeping the soil moist. The spray bottle isn’t a must, but it makes you feel like a pro misting your little seed (and helps avoid drowning it).
Plastic wrap or a bag: To cover the cup and trap humidity. It’ll be like a mini-greenhouse for your seed.
A sunny spot: Find a warm, light-filled spot in your home. A south-facing window is perfect.
Alright, got everything? Let’s get those hands dirty (just a bit).
Step 1: Extract Your Lemon Seeds
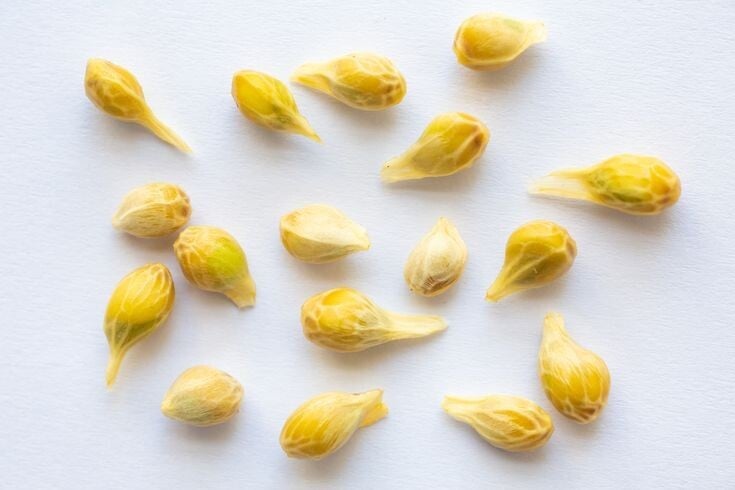
Grab that lemon and cut it open. Pick out a few of the fattest, healthiest-looking seeds from the center.
Now, here’s a little trick: make sure to remove all the pulp from the seeds. You can rinse them in a little water, or do what a quirky gardener friend told me, pop them in your mouth and suck off the citrusy goo.
The point is to get them clean, because any sugary pulp left can create mold once the seed is in the soil.
For extra credit (and if you’re the impatient type like me), you can also carefully peel off the thin white coat on the seed.
It’s fiddly, but I find that seeds tend to sprout faster when I remove that outer coat. Not a required step, so don’t stress if you can’t get it off.
Step 2: Pre-Sprout (Optional but Recommended)
This step is optional, but I highly recommend it because it’s so satisfying to actually see the seed sprout before you plant it.
After cleaning the seeds, keep them moist and warm to encourage sprouting.
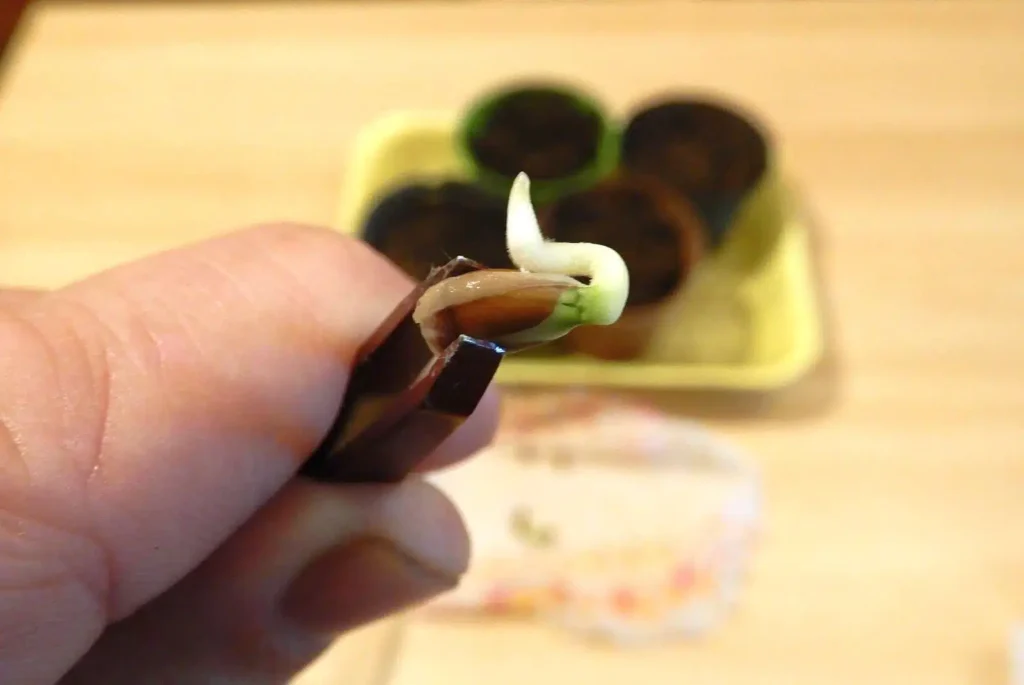
The easiest way: place the seeds on a damp paper towel and fold it up. Stick this little packet inside a plastic bag (I usually half-seal it, leaving a bit of an air gap) and put it in a warm spot.
I’ve had good luck keeping it on top of my fridge or near a radiator. In about 5–10 days, check the towel, and you’ll see a tiny white root poking out of one or two seeds.
That’s your green light to plant. If you don’t see anything after two weeks, your seeds might be duds, it happens, just try again with another seed or two.
If you’re too excited to wait, you can skip the paper towel and plant the seeds directly in the cup. Just know it might take a little longer to see a sprout, and you won’t know which seeds are viable right away.
Step 3: Plant the Seed in the Cup
If you haven’t already, put a small layer of pebbles at the bottom of your cup for drainage.
This helps excess water settle at the bottom away from the seed. Next, fill up your cup with that potting soil.
Fill to about an inch below the rim, so you have space to water later without overflowing.
I like to pat the soil down gently to get rid of big air pockets, but don’t pack it super tight, roots like a bit of breathing room.
If you pre-sprouted a seed: take it out of the paper towel very carefully (the tiny root can be delicate). Using your finger or a pencil, make a small hole in the soil about 1/2 inch deep.
Place the seed in the hole root-side down. If the root has grown a bit long, you can curl it gently to fit, just be careful. As an alternative, you can just bury the cleaned seed about a half-inch deep in the soil.
Cover the seed up with soil and give it a drink of water. Please, don’t drown the poor thing.
I usually sprinkle water or use my spray bottle until the soil is evenly moist but not puddling. The goal is a damp sponge feeling, not sopping wet.
If you’re unsure, have a look at my guide with the watering mistakes you should avoid.
Step 4: Create a Mini Greenhouse
Since lemon seeds are tropical, they thrive in warm, humid conditions. After planting, I cover the top of my cup with a piece of clear plastic wrap (or you can use a zip-lock bag over the top).
Remember to poke a few tiny holes in the plastic for airflow. This creates a cozy little greenhouse environment inside the cup, keeping everything toasty and moist.
Trust me, this makes a difference. The first time I tried without covering, my seed took forever to sprout. With the cover, it was much quicker.
Now just place the whole setup in a warm and sunny spot.
The ideal temperature is roughly what we humans find comfortable, around 65–75°F (18–24°C).
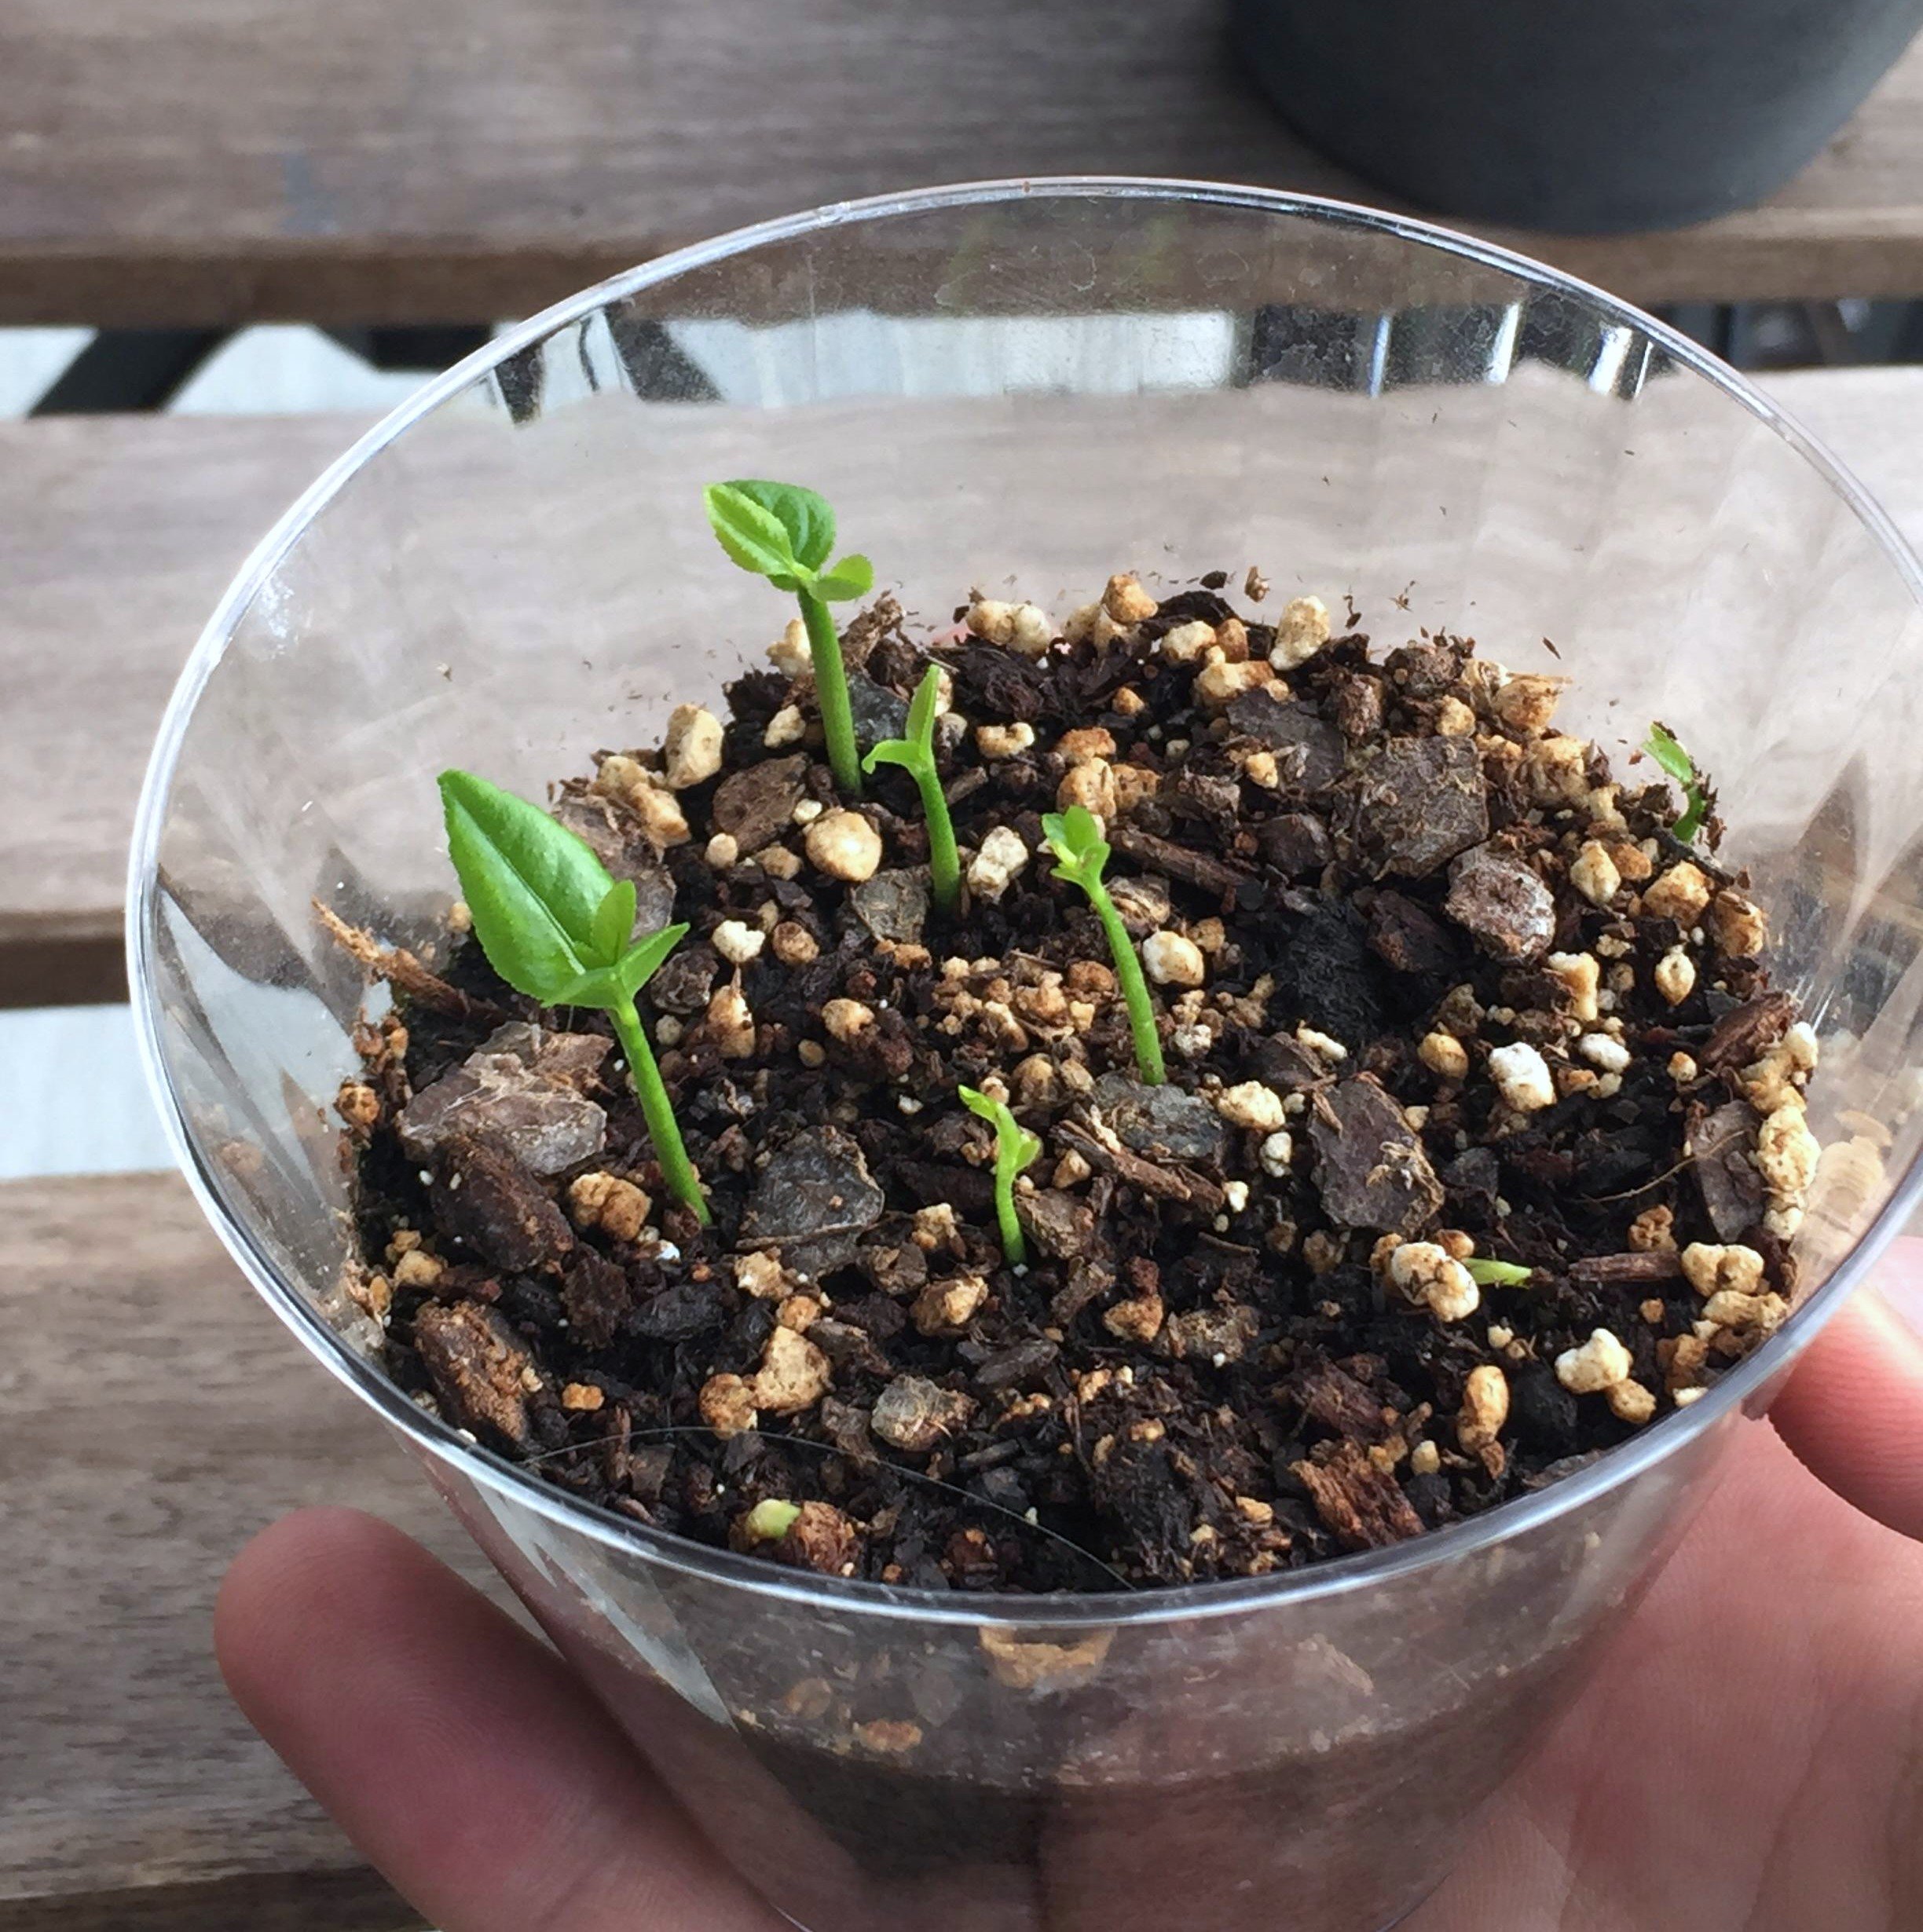
Usually, within 2 to 4 weeks, you’ll see a tiny green sprout peeking through the soil.
Once the sprout is up and about an inch or two tall, you can remove the plastic cover completely and enjoy your new small lemon plant!
PLEASE NOTE: If a month passes and nothing emerges, don’t be too hard on yourself. It happens. Seeds can be finicky. Maybe it was a bad seed, or the environment wasn’t quite right. You can always start a few more seeds as a backup.